Homemade Leaf Shine Recipe for Healthy Houseplants
Want a homemade leaf shine recipe that safely makes houseplant leaves shiny and healthy? This simple DIY spray is one of the easiest and most effective things you can make at home. It doubles as a gentle leaf cleaner, so you get dust-free, glossy leaves in one pass.
Shiny, healthy leaves don’t just look beautiful, they’re a sign of a thriving plant. Below I show you exactly how I make my favourite leaf shine recipe and how I use it to keep my houseplants fresh and naturally glossy.
This homemade mix has been part of my plant care routine for years. It’s gentle, affordable, and uses only ingredients you probably already have in your kitchen. If you love clean, shiny leaves and want to avoid store-bought sprays full of chemicals, this guide is perfect for you.
If you prefer a visual walkthrough, you can watch my video below where I prepare and apply the mixture step by step:

| Ingredient | Amount | What it does |
|---|---|---|
| Full-fat milk | 200 ml | Calcium and proteins for a silky shine |
| Olive oil | 5 to 10 ml | Glossy finish, repels dust and pests |
| White vinegar | 5 ml | Dissolves mineral deposits, cleans the leaf |
Why Clean Leaves Matter
When you think about plant care, watering and light are usually the first things that come to mind. But there’s one essential step many people forget: cleaning the leaves.
Every day, dust and pollutants settle on your houseplants. Over time, this buildup blocks sunlight and clogs the tiny pores (stomata) plants use for breathing. Without enough light or air exchange, their energy drops and growth slows down.
By cleaning your leaves regularly, you help them:
- Absorb more sunlight for photosynthesis 🌞
- Exchange oxygen and carbon dioxide more efficiently
- Resist pests like spider mites and mealybugs
- Look healthier and more vibrant overall
Clean leaves are more than just beautiful, they’re vital for your plant’s well-being. Plus, who doesn’t love seeing that rich, glossy finish when sunlight hits your plant just right?

How to Shine Plant Leaves Naturally: My Routine
This is the routine I have followed for years, and it is the most natural way I know to get shiny leaves without any store-bought product.
1. Shower first. I like to give my plants a gentle lukewarm shower. It is the best way to wash off the dust, and the plant gets a good drink at the same time.
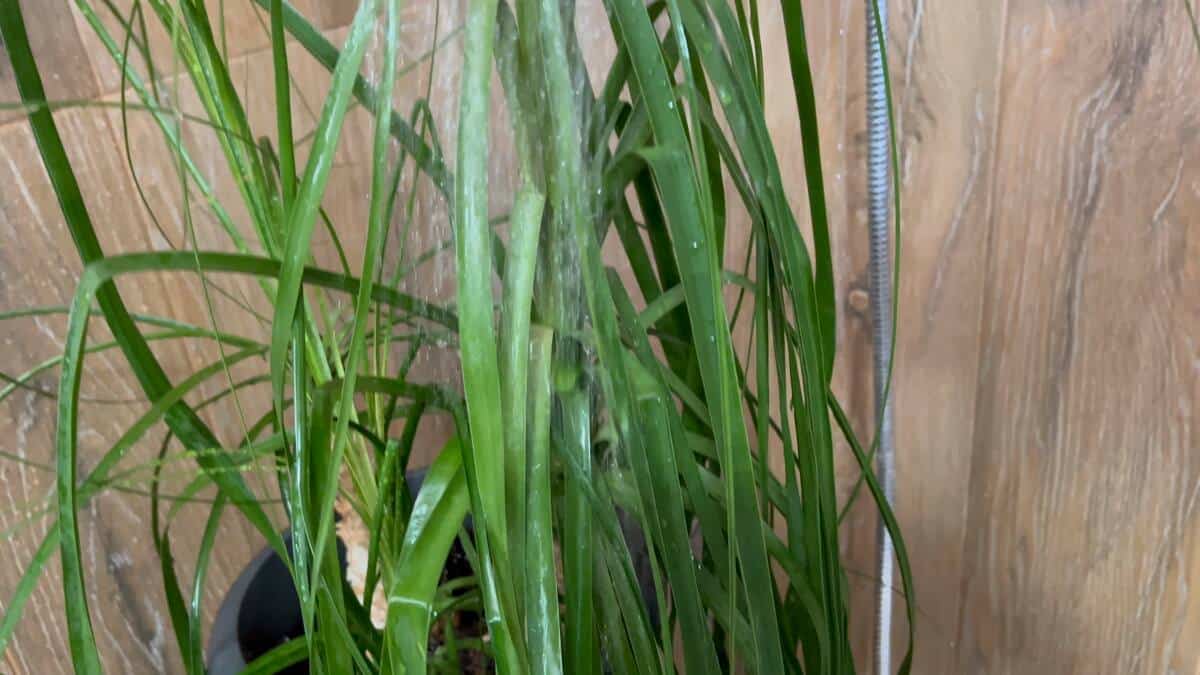
2. Deal with the water spots. After a shower, tap water often leaves white, round marks on the leaves. They are not only ugly, they can also attract pests. This is exactly where my leaf shine mixture helps.
3. Wipe with the mixture, both sides. I dip a small part of a soft cotton or microfiber cloth into the bowl, wring it out a little, and wipe each leaf from the stem to the tip, front and back. Honestly, I find it works better straight from the bowl than from a spray bottle.
4. See the difference. In the photo below, I cleaned only half of a rubber plant leaf that I had left dusty for a long time. The difference is clear straight away.

Can’t shower your plants? No problem. Wipe off the dust with a soft damp cloth first, then use the mixture.
The Magic Mixture: My Leaf Shine Recipe
Now for the fun part: making your very own leaf shine mixture.
This formula has just three ingredients, but they work in perfect harmony. It cleans, nourishes, and protects your plants without leaving any sticky residue.
You’ll need:
- 200 ml full-fat milk: its proteins help give a soft, natural shine.
- 5-10 ml olive oil: adds the glossy finish. I use 5 ml, or 10 ml for extra shine.
- 5 ml white vinegar: helps remove hard water marks and mineral deposits.
Each ingredient has its own job: the milk gives a soft shine, the vinegar clears grime and hard water marks, and the olive oil adds the gloss.
🌿 Tip: Always use fresh, room-temperature ingredients so they blend evenly.

Step-by-Step Preparation
- Measure and mix. Start with 200 ml of full-fat milk in a small bowl. Add 5 ml of white vinegar and then slowly pour in the olive oil.
- Blend gently. Stir the mixture with a spoon or small whisk until it’s uniform. Don’t worry if a few oil circles remain, that’s normal and harmless.
- Transfer and store. You can use the mixture directly from the bowl or pour it into a small spray bottle. Shake well before each use.
The texture should be smooth and slightly creamy, not too oily. If you notice separation, just shake or stir again before applying.
How to Use It
Now that your mixture is ready, it’s time to put it to work!
- Choose a soft microfiber cloth or cotton pad. Avoid rough materials that could scratch delicate leaves.
- Dip and wipe. Soak the cloth lightly in the mixture, then wring out the excess. Support the leaf from below and wipe gently from stem to tip.
- Repeat on the underside. Many pests hide under leaves, so always clean both sides.
- Observe the transformation. You’ll notice a brighter, deeper green and a natural glow, with no artificial sheen.
For heavily dusty leaves, you can give your plant a light shower first, then follow with the shine mixture once it’s mostly dry.
I usually use this mixture about once every four weeks, or whenever I notice dullness. It’s safe, natural, and can be used throughout the year.
If you’re dealing with pests on your houseplants, leaf cleaning alone won’t solve the problem.
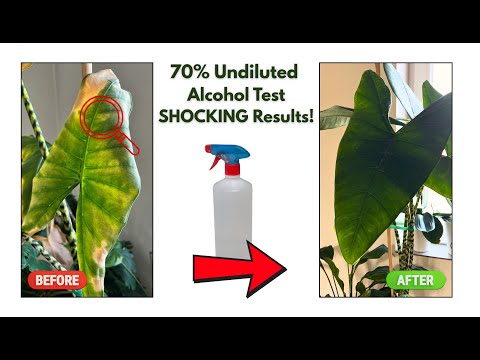
In this video, I show how I tested 70% alcohol on houseplants, sprayed undiluted, to eliminate pests, and what really happened.
Click here to watch the video on YouTube
Which Plants Benefit the Most
This leaf shine recipe works perfectly for plants with smooth, glossy foliage, including:
- Ficus elastica (Rubber Plant)
- Monstera deliciosa
- Philodendron species
- Pothos (Epipremnum aureum)
- Schefflera...
Avoid using it on plants with textured or velvety leaves, such as:
- Alocasia Black Velvet
- Calathea White Fusion
- African Violets
- Begonias with fine hairs
These plants have delicate surfaces that can trap moisture and develop spots when oiled.
🌿 Tip: Always test the mixture on one leaf first. If it looks fine after 24 hours, you can safely clean the rest of the plant.
Also, never reuse the same cloth on multiple plants, because this prevents cross-contamination if one has pests or disease.

Storage & Safety Tips
Because the mixture contains milk, it doesn’t have a long shelf life. You can store it in the refrigerator for up to three days, but always allow it to reach room temperature and shake well before using again.
If you make a larger batch, label the bottle with the date so you know when to prepare a new one. Old mixtures can develop an unpleasant smell and lose their effectiveness.
Keep freshly cleaned leaves out of strong direct sun for a few hours, until the thin film has dried. It is a simple precaution for sensitive plants.
Combine With Other Natural Remedies
If you enjoy homemade plant care products, this recipe can be part of a broader natural routine.
For example, between cleanings, you can use a gentle Neem oil spray for pest prevention, or try my Homemade Lentil Fertilizer to encourage faster growth. These simple DIY formulas work beautifully together to create a healthy, chemical-free environment for your plants.
You can watch how I prepare my natural growth booster in the video below:

Frequently Asked Questions
Can I use this recipe on all houseplants?
No. It’s ideal for glossy leaves but not for fuzzy or velvety ones. Always do a small patch test first.
Will the oil clog my plant’s pores?
Not if used sparingly. The ratio of milk and vinegar prevents buildup and helps the oil spread evenly.
How often should I clean the leaves?
Once a month is perfect. Over-cleaning can remove the natural protective layer of the leaf.
Can I replace olive oil with coconut oil?
It’s not recommended, coconut oil hardens at room temperature and can leave residue. Stick with olive or sunflower oil.
Can you clean plant leaves with olive oil?
Straight olive oil is not a good idea. A thick oil layer clogs the leaf pores and attracts even more dust. The few drops in this recipe are diluted with milk and vinegar, which gives you the glossy finish without suffocating the leaf. If you already wiped leaves with pure oil, rinse them gently with lukewarm water.
How do you shine plant leaves naturally?
Shower your plants first with lukewarm water to wash off the dust. Then dip a soft cloth into this homemade mixture, wring it out a little and wipe each leaf, front and back. The milk leaves a soft natural gloss and the vinegar clears the white water spots. If you cannot shower your plants, wipe the dust off with a damp cloth first.
Can I use vinegar to make plant leaves shiny?
A little white vinegar helps remove the white hard water marks that make many leaves look dull. I only use 5 ml in 200 ml of milk. Never wipe leaves with straight vinegar.
Is milk good for cleaning plant leaves?
Used in a thin layer, yes. It gives a soft, natural shine. Wring the cloth well so you do not leave a thick milky film, and use the mixture fresh because it does not keep for more than a few days in the fridge.
Final Thoughts
I prefer this natural leaf shine recipe to commercial leaf shine sprays. It’s safe, eco-friendly, and gives my plants a soft, healthy glow.
After just one cleaning, you’ll notice your plants look rejuvenated, as if they’ve taken a deep breath of fresh air. Their leaves will feel smoother, look greener, and photosynthesize more effectively.
If you try this recipe, I’d love to hear how your plants respond. Share your results or your own variations in the comments below. Your ideas might inspire someone else in our growing plant community.
And if your houseplants are battling pests like mealybugs, check out my detailed guide:
👉 How to Get Rid of Mealybugs on Houseplants: My 3-Step Alcohol Spray
Click here to watch the video on YouTube
Happy planting, and may your leaves always shine with natural beauty! 🌿


Written by Bojana
Plant lover, grower, and music maker behind Plant House & Garden, with 35+ years of hands-on houseplant experience. Read more about Bojana →