Alocasia Propagation: How to Propagate Alocasia Regal Shield from Corms?
If you love expanding your indoor jungle, learning how to propagate Alocasia Regal Shield is a game-changer. Propagating from corms is one of the most effective and rewarding methods to grow new plants, and today I’ll guide you through every step. Whether you’re a beginner or an experienced plant parent, this method works for all Alocasia varieties.
For a visual walkthrough, don’t forget to watch my detailed video where I show exactly how to propagate Alocasia Regal Shield from corms and share progress updates.

| Stage | What to expect | Rough timeframe |
|---|---|---|
| Sprouting roots | Tiny white roots emerge from the corm. | 2 to 4 weeks |
| First leaf | A small leaf unfurls once roots establish. | 4 to 8 weeks |
| Ready to pot | Roots a couple inches long plus a leaf or two. | 8 to 12 weeks |
| Establishing | The young plant settles into soil and grows steadily. | 3 to 6 months |
What is Alocasia Regal Shield?
Alocasia Regal Shield is a stunning tropical plant known for its large, glossy, deep green leaves that resemble a majestic shield. Each leaf can grow over a foot long, making this plant a dramatic statement in any indoor space.
If you want to learn more about general care for this beauty, check out my in-depth care guide:
What Are Corms? Understanding the Foundation of Alocasia Propagation
Corms are underground storage structures similar to bulbs, but with a solid, swollen stem instead of fleshy layers. Alocasias store nutrients in these corms to survive periods of dormancy. These corms multiply as the plant matures, making them ideal for Alocasia propagation. The corms often lie beneath the soil but can sometimes extend their stems above ground, seeking new growth opportunities.
Tools Needed for Alocasia Propagation
How to propagate Alocasia Regal Shield?
To get started with propagating Alocasia Regal Shield, gather the following materials:
- Transparent plastic container or cup
- Lid or cover
- Perlite (ideal for maintaining moisture)
- Clean scissors for separating corms
- Water spray bottle
How to Propagate Alocasia Regal Shield from Corms, Step by Step
Step 1: Identifying and Separating Corms
The first step in the process of how to propagate Alocasia Regal Shield is identifying the mature corms. Carefully dig around the root system to locate them. If the corm has an attached stem, trim it off to prevent rotting. Use clean scissors for a precise cut and handle the corms gently to avoid damaging any developing roots.
Tip: For successful Alocasia propagation, ensure that each corm is mature enough to support root and leaf development.
You can watch my video below for better visual instructions on how to propagate Alocasia Regal Shield:

Step 2: Preparing the Corms for Planting
Before planting the corms, it's beneficial to remove any dark, outer layer on the corm’s surface. This step isn’t mandatory, but it can expedite root development. Use your nails or a small knife to peel off the layer. If it resists, wait 48 hours and try again.
Step 3: Setting Up the Propagation Container
It is important to know how to propagate Alocasia Regal Shield, because most importantly it thrives in moist environments, and perlite is perfect for this purpose. Add perlite to the container, filling it about one-third, and pre-soak it with water to ensure it retains adequate moisture. Gently place the corms on the perlite, with the stem side facing down to promote root growth, and cover with a lid to lock in humidity.
Light Requirement: Position the container in bright, indirect light. Direct sunlight can be too intense and may dry out the perlite, which can hinder propagation.

Step 4: Maintaining Moisture and Light
To encourage growth, mist the corms and inner walls of the container regularly, keeping the perlite consistently moist. Use a shallow tray under the container to replenish water as needed. Remember, moisture is essential for Alocasia propagation, but over-watering should be avoided.
Step 5: Monitoring Progress and Transplanting
After about two weeks, check for root development. It’s normal for each corm to develop at its own pace. Once roots are established and a leaf begins to form, the corm is ready for transplanting.
Step 6: Transplanting the New Alocasia Plant
When the new plant is ready, use a mix of 50% perlite and 50% aroid potting soil. Avoid transferring directly into soil, as young roots adapt better to this aerated mixture. Choose a small pot, preferably one that allows the Alocasia to remain slightly root-bound. This plant thrives in snug containers.
- Fill the pot halfway with your soil mix.
- Gently remove the corm from the perlite and check the roots.
- Position the plant in the pot and cover it with additional soil.
How to Propagate Alocasia Regal Shield: Advanced Tips for Optimal Success
When learning how to propagate Alocasia Regal Shield, understanding subtle details can make a significant difference in your propagation success. Beyond identifying and separating corms, consider the following advanced tips to encourage healthier, faster growth.
Encouraging Faster Root Development
To accelerate root formation during propagation, some growers gently soak the corms in a diluted rooting hormone solution or natural alternatives such as willow water. This stimulates root cell division and encourages robust root systems. However, always use hormones cautiously and in moderation to avoid damaging delicate new growth.
The Importance of Temperature Control
Temperature plays a crucial role in how to propagate Alocasia Regal Shield effectively. Maintaining a warm environment between 75°F and 85°F (24°C to 29°C) helps activate the corm’s growth processes. You can use a propagation heat mat under your container to provide consistent warmth, especially in cooler climates or during winter months.
Using Transparent Containers for Monitoring Growth
For those dedicated to mastering how to propagate Alocasia Regal Shield, using transparent containers or jars can be incredibly useful. Transparent setups allow you to visually monitor root and leaf development without disturbing the plant. This helps you identify any issues early, such as mold, excessive moisture, or root rot, and adjust care accordingly.
Avoiding Common Propagation Pitfalls
Many beginners struggle with overwatering or insufficient humidity when learning how to propagate Alocasia Regal Shield. It’s vital to balance moisture-keep the growing medium damp but never soggy. Too much water invites rot, while too little slows growth. Using a hygrometer inside your propagation space can help maintain ideal humidity around 60-70%.
How to Propagate Alocasia Regal Shield: Using Leaf Cuttings vs. Corms
While propagation from corms is the most reliable and commonly recommended method, some growers experiment with leaf cuttings. However, how to propagate Alocasia Regal Shield via leaf cuttings is less predictable and often slower, as leaves alone cannot generate a complete new plant without the corm or stem base.
If you wish to try leaf propagation, cut a healthy leaf with a small portion of the stem, then root it in water or moist sphagnum moss. Patience is key here, as it can take several months for roots and new shoots to form-if at all.
Propagation Frequency: How Often Can You Propagate Alocasia Regal Shield?
Many plant enthusiasts ask, how often can you propagate Alocasia Regal Shield? Unlike some fast-growing plants, Alocasia Regal Shield grows relatively slowly, so it’s best to space out propagation attempts to allow your mother plant time to recover and develop new corms.
Typically, propagating once every 1 to 2 years is ideal. Propagating too frequently can stress the plant and affect its overall health and vigor.
Corms can take weeks to sprout, so it helps to keep notes. My Plant Care Journal has a propagation log where you can track each corm’s roots and first leaf, so you always know which ones are on schedule.
Frequently Asked Questions
How long does it take to propagate Alocasia Regal Shield from corms?
Most corms sprout roots within 2 to 4 weeks and push out a first leaf around 4 to 8 weeks, though warmth and humidity make a big difference. Expect a potting-ready plantlet in roughly 8 to 12 weeks.
What are Alocasia corms?
Corms are small, round storage bulbs that grow along the roots of an Alocasia. Each healthy corm can grow into a brand new plant, which makes them the easiest way to multiply an Alocasia Regal Shield.
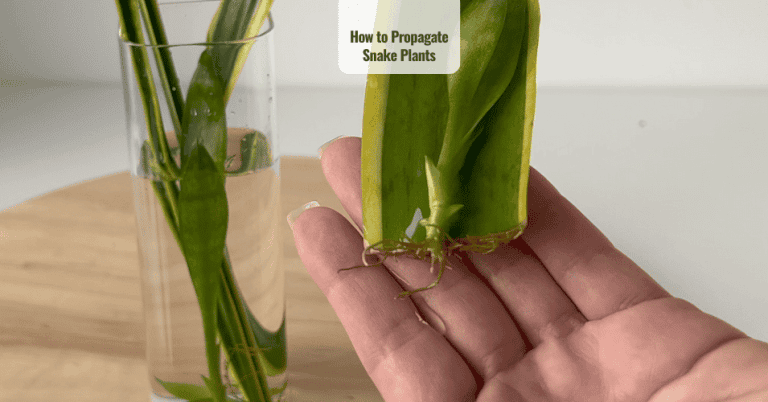
Should I propagate Alocasia corms in water or moss?
Both work. Water lets you watch the roots form and is simple for beginners, while damp sphagnum moss holds steady humidity and tends to reduce rot. Many growers start corms in moss, then pot them up once rooted.
Why are my Alocasia corms not sprouting?
Corms are slow and need warmth, humidity, and patience. Cold rooms, dry air, or a corm that was not yet mature can all stall sprouting. Keep them around 70 to 75 degrees Fahrenheit, lightly moist, and give them several weeks before giving up.
When can I pot up a propagated Alocasia corm?
Move a corm into soil once it has roots a couple of inches long and at least one healthy leaf. Use a chunky, airy aroid mix and keep humidity up while it settles in.
Final Tips for Successful Alocasia Propagation
For best results, on how to propagate Alocasia Regal Shield, keep your newly propagated Alocasia Regal Shield in a humid environment with indirect light. Covering the plant lightly for the first few days after transplanting can help it adjust. Maintain a warm setting with about 60% humidity, and provide consistent, moderate watering to prevent stress on young roots.
Alocasia propagation can be a fulfilling journey. With patience and proper care, you'll soon enjoy a thriving new Alocasia Regal Shield in your home.
If you want to learn more about caring for your Alocasia Regal Shield and keeping it healthy beyond propagation, check out my detailed guide here: Alocasia Regal Shield Care.

Want to multiply more of your plants? This guide is part of my complete houseplant propagation guide, where every method is explained in one place.

Written by Bojana
Plant lover, grower, and music maker behind Plant House & Garden, with 35+ years of hands-on houseplant experience. Read more about Bojana →