How to Propagate Snake Plants from Leaves in Water
If you’ve been wondering how to propagate snake plants from leaves in water, you’ve come to the right place. Propagating snake plants using leaf cuttings is one of the easiest and most rewarding ways to multiply your collection. Whether you want to fill your home with more greenery or gift new plants to friends and family, this method is perfect for beginners and experienced plant lovers alike.
Snake plants root readily in water, much like lucky bamboo care, which keeps the stalks living in water permanently.
In this guide, I’ll walk you through the full process of how to propagate snake plants from leaves in water, share essential care tips, and explain what to expect during each stage. Plus, for a visual walkthrough, you can watch my detailed video tutorial linked below.
Why Propagate Snake Plants from Leaves in Water?
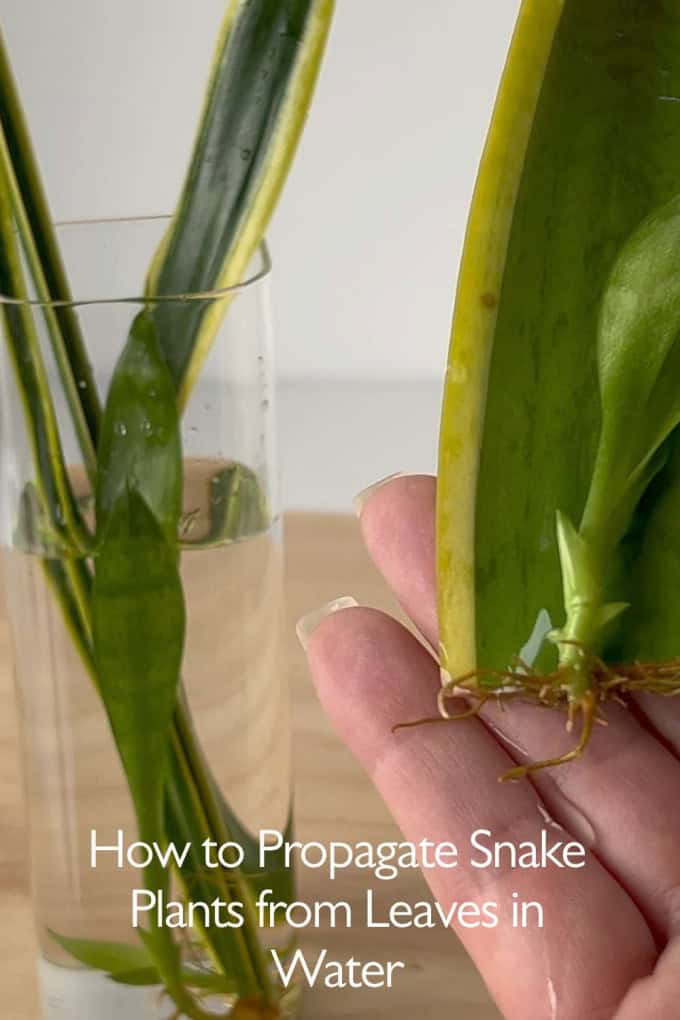
Snake plants (Sansevieria) are known for their durability and low maintenance, making them a popular indoor plant. Propagating them from leaf cuttings in water offers several advantages:
- Easy to do at home: No special equipment required, just a healthy leaf and some water.
- Cost-effective: Multiply your plants without buying new ones.
- Visual progress: Watch roots grow as you nurture your cuttings in clear water.
- Perfect for gifts: Share beautiful, home-grown plants with loved ones.
This propagation method is gentle and effective, allowing you to enjoy the beauty of new snake plants in just a few weeks.
Step-by-Step: Rooting Snake Plant Leaves in Water
| Stage | What happens |
|---|---|
| Day 0 | Cut a healthy mature leaf into 3 to 4 inch sections. Mark which end was the bottom. |
| Day 1 to 2 | Leave the pieces somewhere dry and shaded so the cut ends callous over. |
| Week 1 to 2 | Stand them bottom-end down in an inch of clean water, bright indirect light. Change the water weekly. |
| Week 3 to 6 | First roots appear at the base of the cutting. |
| Week 6 to 10 | Roots reach a few inches. Pot up into a gritty, well-draining cactus mix. |
| Month 3 to 6 | A pup pushes up beside the original leaf. That is your new plant. |
1. Selecting and Cutting Healthy Leaves
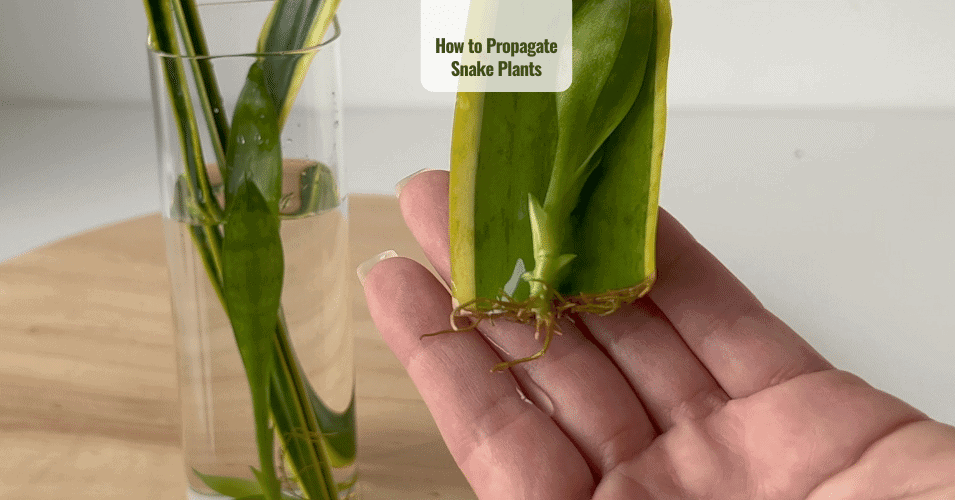
Choose a healthy, mature leaf from your existing snake plant. Using a sharp, clean knife or scissors, cut the leaf near the base. For best results, cut the leaf into 3-4 inch sections. Remember to note which end is the bottom (the part that was closer to the roots), as this is the end that should go into the water.
2. Preparing Leaf Cuttings for Rooting
Allow the cut leaf sections to dry for 1-2 days. This helps prevent rot by allowing the cut ends to callous over. Once dried, place the bottom end of each cutting into a clean jar or vase filled with filtered water. Ensure the water covers only the base, keeping most of the leaf above water to avoid rotting.
3. Providing the Right Environment
Place your jar in a warm spot with bright, indirect light. Avoid direct sunlight, which can damage delicate cuttings. Change the water every 1-2 weeks to keep it fresh and prevent bacterial growth. Within 3-6 weeks, you should see roots emerging from the base of the cuttings.
4. Transplanting into Soil
Once roots are a few inches long and healthy, it's time to transfer the cuttings into a pot with well-draining soil. Use a mix suited for succulents or cacti to ensure excess water drains away quickly. Water lightly after planting and gradually increase as the plant establishes.

Important: Variegated Snake Plants Lose Their Yellow Edges in Water
This is the one thing almost nobody warns you about, and it catches people out every time. If your snake plant has those beautiful golden yellow margins, the popular Sansevieria trifasciata Laurentii for example, a leaf cutting will not reproduce them. The new plant comes back plain green.
The reason is that the yellow edge is a chimera. It is a separate layer of tissue sitting over the green, rather than something written into every cell. New growth from a leaf cutting comes from the green tissue only, so the variegation simply is not carried over.
If you want to keep the variegation, divide instead. Tip the plant out of its pot, find a pup that has its own roots and is attached to the rhizome, and separate it with a clean knife. That pup keeps every stripe of the parent. Leaf cuttings in water are perfect for the plain green forms and for zeylanica, and they are a lovely thing to watch, just go in knowing what you will get.
Worth knowing too: botanists reclassified snake plants as Dracaena trifasciata back in 2017, so you will see both names used. Same plant, same care.
Caring for Your Propagated Snake Plants
Snake plants are famously low maintenance. To keep your newly propagated plants healthy:
- Light: Provide bright indirect light but tolerate low light conditions.
- Watering: Water sparingly; snake plants prefer drying out between waterings.
- Humidity: Average household humidity works well.
- Fertilizing: Feed with a balanced, diluted fertilizer during growing seasons (spring/summer).
By following these care tips, your propagated snake plants will flourish and bring fresh life to your home.

Common Mistakes That Kill Snake Plant Cuttings
There are a few common pitfalls that can slow you down or stop the cuttings rooting altogether. Avoiding these mistakes will save you time and help your new snake plants thrive.
The most frequent error by far is not allowing the cut leaf ends to dry and callous before placing them in water. Plant cuttings placed in water too soon can develop rot, which kills the cutting before roots can form. Always let the leaf cuttings rest for at least 24 to 48 hours in a dry, shaded spot before beginning water propagation.
Another mistake is submerging too much of the leaf in water. Only the bottom inch or so should sit underwater. If the entire leaf is submerged, it can rot quickly, leading to failure.
Water quality also plays a role in successful propagation. Use filtered or distilled water whenever you can. Tap water with high chlorine or mineral content may stress the cuttings and delay root growth.
Lastly, don’t rush the process! Healthy root development takes several weeks, so patience really is part of the method. Keep the cuttings in a warm, bright spot (away from direct sun), change the water regularly, and you’ll soon see strong roots ready for planting.
Common Challenges & Troubleshooting Tips
Rotting cuttings: Ensure cut ends dry before water propagation and avoid submerging leaves fully.
Slow root growth: Keep cuttings in a warm, stable environment and be patient.
Yellowing leaves: Avoid overwatering once in soil, and ensure good drainage.
For a detailed step-by-step visual guide, watch the video below. See the entire process from cutting to rooting to planting, and learn tips to ensure your success.
If you want to learn something more about organic fertilizers for houseplants make sure to click here and check it out!

Snake Plant Propagation FAQs
How long does it take to propagate a snake plant in water?
Roots usually show at 3 to 6 weeks, and the cutting is ready for soil at around 6 to 10 weeks once the roots are a few inches long. The pup, which is the actual new plant, often takes another 3 to 6 months to appear. Snake plants are slow, and that is normal.
Why is my snake plant cutting rotting instead of rooting?
Almost always because the cut end went into water before it had calloused, or because too much of the leaf is submerged. Let the cut ends dry for 1 to 2 days first, and keep only the bottom inch in water.
Will a variegated snake plant stay variegated from a leaf cutting?
No. The yellow margin is a chimera, a separate layer of tissue, and leaf cuttings grow back from the green tissue only. The new plant comes out plain green. To keep the variegation you have to divide a rooted pup instead.
Do I need to change the water while propagating?
Yes, change it every week or two. Fresh water keeps bacteria down and stops the cut end going slimy. Filtered or distilled water is best, since snake plants dislike heavy chlorine and minerals.
Can I propagate a snake plant leaf straight into soil?
You can, and it works well. Callous the cut end the same way, then push it about an inch into a gritty cactus mix and water sparingly. You lose the fun of watching the roots form, but rot is less likely.
Related Articles
- Snake Plant Color Difference: Yellow Edges vs Green Leaves (Light & Variegation Explained)
- Snake Plant Problems: 5 Common Mistakes to Avoid for Healthy Plants
- The Complete Houseplant Propagation Guide
- Best Frequency for Plant Growth: 432 Hz vs 528 Hz
- Rubber Plant Problems: 5 Mistakes to Avoid (Ficus Elastica)
Want to multiply more of your plants? This guide is part of my complete houseplant propagation guide, where every method is explained in one place.

Written by Bojana
Plant lover, grower, and music maker behind Plant House & Garden, with 35+ years of hands-on houseplant experience. Read more about Bojana →