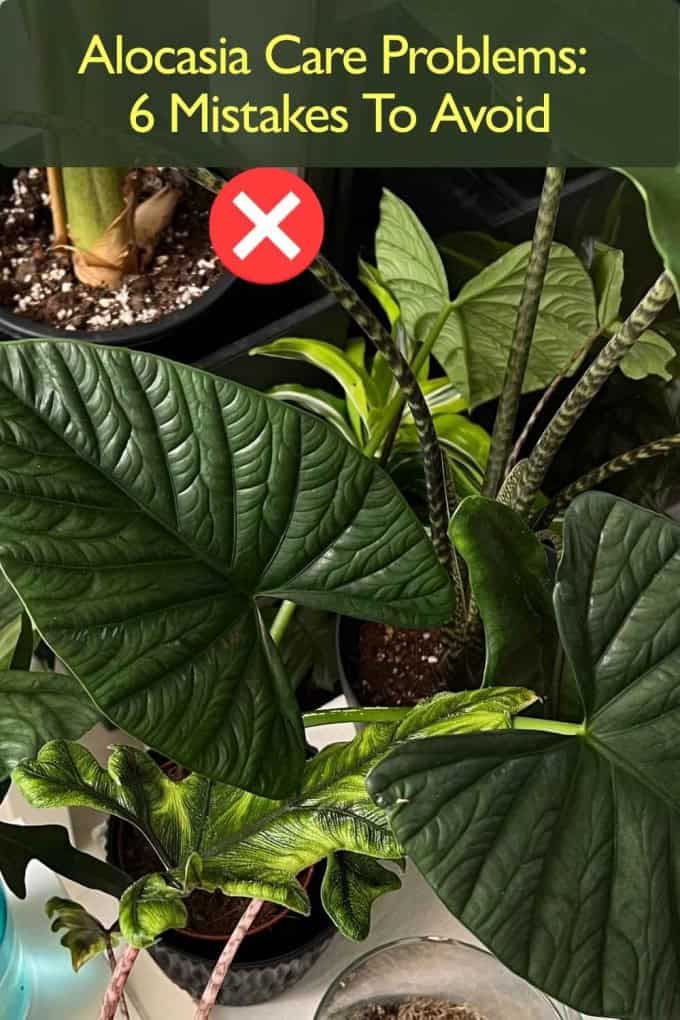
Alocasia Care Problems: 6 Mistakes To Avoid
If you're struggling with Alocasia care problems, you're not alone. Alocasia plants are stunning, but they’re also some of the most dramatic houseplants you can own - one small change in their environment, and they’ll instantly show it through yellow leaves, brown spots, or sudden drooping.
These same fixes apply across the genus, including fussier types like the Alocasia Silver Dragon.
The good news? Most Alocasia issues come from just a handful of common mistakes that are easy to fix once you know what to look for. In this guide, you’ll discover the 6 most common Alocasia care mistakes to avoid, plus a bonus tip that even experienced plant parents often overlook. These simple changes can transform your stressed Alocasia into a thriving, lush centerpiece again.

Before We Start: Why Alocasias Are So Sensitive
Alocasias react quickly because they come from warm, humid tropical forests where conditions stay stable year-round. Indoors, even small changes in watering, light, temperature, or pests can trigger visible stress. That’s why understanding these mistakes is key to keeping your plant happy, growing, and full of fresh leaves.
Now let’s break down the 6 most common Alocasia care mistakes and how to avoid them.
Got a struggling plant? Watch me fix it, propagate new ones, and grow happier houseplants, all to my signature 432 Hz music.
✅ Mistake #1: Overwatering (The Fastest Way to Kill Your Alocasia)
Overwatering is the number one reason Alocasias decline, and it’s the most common issue I see with struggling plants. These tropical beauties love moist air, but their roots must never sit in constantly wet soil. When water fills all the air pockets in the pot, the roots can’t breathe, leading to rot and rapid leaf loss.
Botanical research backs this up. Studies from the University of Florida IFAS and the Royal Horticultural Society note that Alocasias grow from corms and rhizomes that naturally hold moisture, which makes them highly sensitive to reduced oxygen in waterlogged soil. In simple terms:
they store water in their roots - so they don’t need much from you.
Common Symptoms of Overwatering in Alocasia
Recognizing the signs early can save your plant before root rot sets in. Overwatered Alocasia often shows:
- Yellowing leaves starting from the bottom
- Droopy, soft stems or petioles
- Soil that stays wet for more than 4-5 days
- Mushy or brown roots when inspected
- Fungal smell coming from the pot
- Black spots or leaf “melting” (often mistaken for pests)
Most people confuse these symptoms with underwatering, but the key difference is that overwatered leaves are soft and limp, while underwatered leaves are dry and crisp.
The best approach?
✔ Water only when the top 2-3 inches of soil are dry.
This gives the roots time to breathe and prevents fungal pathogens from developing.
✔ Avoid oversized pots.
Large pots hold excess water around the root ball, and research consistently shows oversized containers dramatically increase the risk of root rot in tropical houseplants.
✔ Use a chunky, fast-draining mix (coco coir + perlite + orchid bark).
This mimics the loose forest floor where Alocasias grow in nature and supports proper aeration.
And remember - healthy Alocasia roots are white or cream-colored and firm.
If you notice yellowing leaves, drooping, or the soil staying wet for too long, it’s worth gently checking the roots before the problem spreads.
Want to improve your soil? You may also find this article helpful:
👉 Why Sphagnum Moss for Houseplants Is So Popular

Click here to watch the video on YouTube
✅ Mistake #2: Low Humidity & Temperature Stress (A Silent Growth Killer)
Alocasias don’t just prefer humidity - they depend on it. When the air in your home drops below 50%, the leaves begin to lose moisture faster than the roots can replace it. The result?
✔ crispy edges
✔ drooping leaves
✔ slowed growth
✔ increased susceptibility to pests
Scientific horticultural guidelines (including the University of Arkansas Extension and RHS) note that Alocasias evolved in warm, humid understory environments where humidity often stays between 60-80%. When levels fall below this threshold, the plant enters moisture-defense mode - closing stomata, slowing photosynthesis, and weakening over time.
Temperature swings make the problem even worse.
Drafts, AC vents, heaters, open windows, or sudden night drops below 65°F (18°C) can shock the leaves, causing them to curl or turn pale.
How to Fix It
✔ Keep humidity above 55-60%. A small humidifier works wonders.
✔ Avoid cold drafts, heaters, and air conditioners.
✔ Place your Alocasia at least 3-4 feet away from vents.
✔ Cluster plants together to raise humidity naturally.
If your Alocasia has been stressed for a while, you may notice smaller new leaves or longer petioles. This is the plant stretching for better conditions - and it’s a sign to improve humidity and warmth.
And one more important thing - I don’t recommend misting Alocasia leaves. Misting doesn’t actually raise humidity in a meaningful way, and it can create the perfect conditions for fungal spots and pest problems. If you want to understand why misting isn’t the best option, read my full article The Truth About Misting Houseplants: Should You Do It or Not?
🚫 Keeping Alocasia in Closed Cabinets
Many people place their Alocasia inside glass plant cabinets for extra humidity, but this can backfire if the air inside is stagnant. Without airflow, the leaves may develop spots, melt, or attract spider mites.
Alocasia prefers humidity with ventilation, not trapped moisture.
If you want to know more about humidity and temperature for houseplants - and why they’re so important for healthy growth - read my full article Humidity and Temperature for Houseplants.
Common Alocasia Symptoms & What They Mean
Caring for Alocasia can be confusing because one small change in the environment can completely change how the plant reacts. To make things easier, here is a quick symptom guide that helps you understand what your Alocasia is telling you and how to fix it.
| Symptom | Likely Problem | Solution |
|---|---|---|
| Yellow leaves | Overwatering, low light | Let the soil dry more between waterings and move to brighter light. |
| Curling leaves | Low humidity, cold drafts | Increase humidity and keep the plant away from sudden temperature changes. |
| Brown tips or edges | Dry air, mineral buildup in water | Raise humidity and use filtered or rainwater. |
| Droopy plant | Underwatering or early root rot | Check soil moisture, adjust watering, and inspect roots if needed. |
| Pale or dull leaves | Not enough light | Move closer to a bright window or use a grow light. |
| Leaf spots | Fungal or moisture issues | Improve airflow and avoid misting the leaves. |
If your Alocasia shows any of these symptoms, scroll down through the mistakes to find the exact cause and solution for your plant.
✅ Mistake #3: Not Enough Light (Slow Growth, Drooping & Small Leaves)
One of the most overlooked Alocasia care problems is insufficient light. Many plant owners assume Alocasias can live in low light because they are tropical understory plants - but this is a misconception. In nature, Alocasias still receive bright, filtered light for most of the day. Indoors, light levels are far weaker, especially several feet away from windows.
When the plant doesn’t receive enough light, you’ll notice:
✔ long, stretched petioles
✔ smaller new leaves
✔ fading color or dull leaves
✔ slow or completely stalled growth
✔ leaves leaning strongly toward the window
Low light also makes other problems worse - especially overwatering. When photosynthesis slows down, the plant uses less water, causing soil to stay wet longer and increasing the risk of root rot.
How Much Light Does Alocasia Really Need?
Alocasias thrive in bright, indirect light. A spot near an east or west window is ideal, or a few feet back from a bright south-facing window. If your home doesn’t get much natural light, a simple LED grow light for a few hours a day can dramatically improve growth, leaf size, and color.
How to Fix It:
✔ Move your Alocasia closer to a bright window (but avoid direct hot sun).
✔ Rotate the pot every 1-2 weeks for even growth.
✔ Consider adding a grow light if your home is naturally dim.
✔ Avoid placing Alocasias deep inside rooms or far from windows.
With proper lighting, you’ll see thicker stems, larger leaves, and faster unfurling - a clear sign the plant finally has the energy it needs.
If you want to know more about light requirements for houseplants and how to find the perfect spot for each plant, read my full article Light Requirements for Houseplants: The Secret to Thriving Indoor Plants.

Click here to watch the video on YouTube
✅ Mistake #4: Wrong Soil Mix (Dense, Heavy Soil Suffocates Your Alocasia)
One of the most overlooked Alocasia care problems is using soil that’s too dense. These plants grow from corms and thick rhizomes, which require fast-draining, airy soil to stay healthy. When the soil is compact, moisture gets trapped around the roots - creating the perfect environment for:
✔ root rot
✔ yellowing leaves
✔ fungus gnats
✔ weak, slow new growth
Research from the University of Florida IFAS confirms that aroid plants perform best in substrates with high aeration, allowing oxygen to reach the roots even after watering. Heavy potting mixes reduce oxygen levels, which can cause the roots of Alocasias to suffocate long before visible symptoms appear.
What type of soil does Alocasia actually need?
Your Alocasia wants a mix that drains quickly but still holds a bit of moisture - similar to the loose, airy forest floor of its native habitat. The goal is oxygen first, moisture second.
✔ The Perfect Soil Mix for Alocasia:
Use a blend like:
- 40% high-quality potting soil
- 30% perlite
- 20% orchid bark
- 10% coco coir or sphagnum moss
This mix mimics natural conditions and ensures the roots never sit in stagnant moisture.
✔ How to Fix Compacted Soil
If your current soil feels heavy or stays wet for more than 4-5 days, it’s time to repot:
- Gently loosen the root ball to remove old, compacted soil
- Choose a pot with drainage holes
- Replant using a fast-draining aroid mix
- Water lightly for the first 1-2 weeks to reduce transplant shock
This one change alone often leads to bigger leaves, stronger stems, and faster growth.
👉 If you want your aroids to grow strong, healthy roots, read my full article Soil-Free Aroid Potting Mix: The Best DIY Recipe for Healthy Aroid Plants and learn how to make the perfect mix at home.
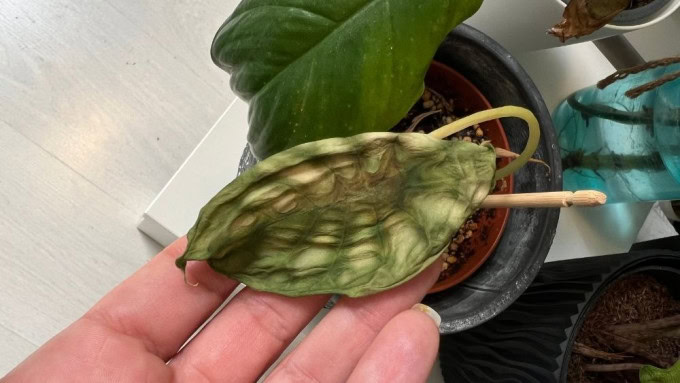
✔ A Note on Repotting: Alocasias Are Dramatic Plants
Alocasias are famously sensitive during and after repotting. Even if you do everything correctly, you may see:
✔ one or two yellowing leaves
✔ temporary drooping
✔ slower growth for a few weeks
✔ in severe cases, the whole plant may collapse temporarily
This is transplant shock, and it’s completely normal for this plant family.
During recovery:
- Keep the soil slightly moist - not wet
- Avoid fertilizing
- Give bright, indirect light
- Increase humidity if possible
With stable conditions and patience, the plant usually bounces back stronger.
✅ Mistake #5: Using Pots Without Drainage (or Pots That Are Too Big)
If there is one thing Alocasias cannot tolerate, it’s sitting in trapped water.
A pot without drainage - or one that is far too large - is almost a guaranteed way to create root rot, fungal issues, and long-term decline.
🚫 Why No-Drainage Pots Are So Dangerous
Without a drainage hole, excess water has nowhere to go. Even if you think you water lightly, moisture builds up at the bottom of the pot, reducing oxygen around the roots. This is one of the most common Alocasia care problems, and the plant reacts quickly with:
✔ yellow leaves
✔ soft, mushy stems
✔ a sour smell from the soil
✔ dramatically slowed growth
University extension research on aroids repeatedly emphasizes that oxygen availability around the root zone is just as important as water. No drainage = no oxygen.
🚫 Why Oversized Pots Are Just as Bad
Many plant parents think “bigger pot = more room to grow,” but for Alocasia, it works the opposite way.
When a pot is too large:
- The soil stays wet for too long
- The roots can’t absorb moisture quickly enough
- Fungal pathogens multiply
- The plant puts all its energy into root exploration instead of leaves
This often leads to yellowing leaves, wilting, or even a rapid collapse that looks like pest damage - but is actually moisture imbalance.
✔ The Ideal Pot Choice for Alocasia
Choose a pot that is:
- only 1-2 inches larger than the current root ball
- made of plastic or ceramic (terracotta dries too quickly for some varieties)
- always with at least one drainage hole
If you love decorative pots without drainage, use them as cachepots:
Keep your Alocasia in a nursery pot inside the decorative one and remove it when watering.
✔ Quick Fix If You Already Used a No-Drainage Pot
If you suspect trapped water or root stress:
- Slide the plant out gently
- Inspect the bottom - if it’s soggy, repot in well-draining mix
- Trim mushy roots
- Let the plant rest in bright, indirect light
And remember:
Consistent moisture, not constant moisture, is the key to this dramatic plant.
❌ Mistake #6: Ignoring Early Signs of Spider Mites (Alocasia’s #1 Enemy)

If your Alocasia suddenly develops tiny yellow dots, faded patches, or leaves that look “dusty,” there’s a very high chance you’re dealing with spider mites - the most common and most destructive pest affecting this plant family.
Alocasias have thin, tender leaves and high humidity needs, making them ideal hosts for mites. And the worst part? Spider mites thrive in the exact opposite conditions - dry air, warm temperatures, and poor air circulation.
Once they settle on your Alocasia, they feed on leaf cells and multiply extremely fast.
Left unnoticed, they can destroy an entire plant in just a few weeks.
How to Recognize Spider Mites Early
✔ tiny white or yellow speckles (stippling)
✔ fine webbing under leaves or between petioles
✔ leaf edges curling inward
✔ dull, faded, or grayish leaves
✔ dusty appearance on stems or soil
Because spider mites are microscopic, most plant parents don’t notice them until damage becomes obvious.
Why Alocasias Are So Prone to Spider Mites
- low humidity dries the leaf surface
- heaters & AC units create ideal mite conditions
- wide, thin leaves = perfect feeding ground
- stagnant corners with poor airflow allow fast reproduction
Spider mites are practically invisible - which is why this is one of the most overlooked Alocasia care problems.
How to Fix It (FAST)
✔ Step 1: Wash the Leaves Thoroughly
Rinse both sides of the leaves with lukewarm water to remove as many mites as possible.
✔ Step 2: Use Neem Oil or Insecticidal Soap
Wipe or spray the leaves, making sure to coat the undersides where mites hide.
✔ Step 3: Increase Humidity & Airflow
Mites hate moisture. Keeping humidity between 55-65% slows their reproduction significantly.
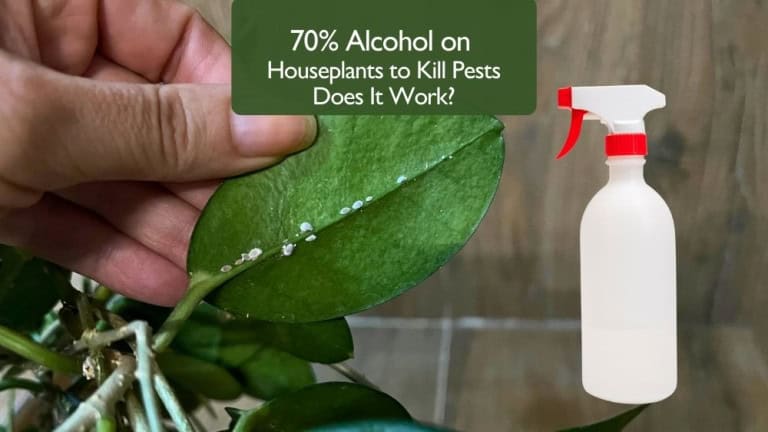
✔ A Rapid 3-Day Treatment: 70% Isopropyl Alcohol
One of the fastest and most reliable treatments is 70% isopropyl alcohol.
It breaks down the mites’ protective layer on contact - often clearing an infestation in as little as 3 days.
For full instructions with photos, see my detailed article:
👉 How to Get Rid of Spider Mites Fast Using 70% Alcohol
Before We Wrap Up…
These six issues are the most common and most damaging Alocasia care mistakes - the ones plant parents run into again and again. But they’re not the only ones.
Alocasias are dramatic, sensitive, and full of surprises, and there are several less obvious problems that can also affect growth, leaf size, and overall plant health. I’ll be covering those deeper, more unusual Alocasia challenges in my upcoming articles, so stay tuned.
Alocasias punish guesswork, so tracking their care really helps. My Plant Care Journal lets you log watering, light, and humidity for each Alocasia, so you can catch the early warning signs long before a leaf is lost.
Final Thoughts
Alocasias may have a reputation for being fussy, but once you understand their needs - consistent moisture, warm temperatures, high humidity, good airflow, and the right soil - they become incredibly rewarding plants.
Most issues come from just a few avoidable mistakes, and now you know exactly how to prevent them.
Keep an eye on your plant’s signals, make small adjustments when needed, and your Alocasia will reward you with big, glossy leaves and steady growth all year long.
FAQ: Alocasia Care Problems (Expert Answers)
Why are my Alocasia leaves turning yellow?
Yellow leaves are one of the most common Alocasia care problems. The usual causes include overwatering, low light, or natural leaf shedding. Check soil moisture first - if the soil stays wet for too long, roots begin to rot. Move your plant to brighter indirect light and allow the top 2-3 inches of soil to dry before watering again.
Why are the edges of my Alocasia leaves turning brown?
Brown edges typically appear from low humidity, dry air, or mineral buildup in tap water. Keep humidity above 55-60%, avoid placing your Alocasia near heaters or vents, and switch to filtered or rainwater if mineral spots keep appearing.
Why is my Alocasia drooping or collapsing?
A droopy Alocasia usually indicates underwatering, early root rot, or temperature stress. These plants react dramatically to changes. Check soil moisture, inspect roots if needed, and keep the plant away from cold drafts or sudden temperature drops below 65°F (18°C).
What causes curling leaves on my Alocasia?
Leaf curling is often related to low humidity or inconsistent watering. When humidity drops, the leaves curl to reduce moisture loss. Increase humidity, keep a stable watering routine, and avoid misting (which can lead to fungal issues). Read more here: The Truth About Misting Houseplants: Should You Do It or Not?
How do I know if my Alocasia has spider mites?
Spider mites are a very common Alocasia care problem. Look for tiny dots, dusty speckles on the leaves, or faint webbing. If you see these signs, isolate your plant and start treatment immediately. A 70% isopropyl alcohol solution can remove spider mites within 3 days.
How often should I water my Alocasia?
There is no fixed schedule. Water only when the top 2-3 inches of soil feel dry. Alocasias are extremely sensitive to overwatering; keeping the soil constantly wet is the fastest way to cause root rot. Always use a pot with drainage.
Related Articles
- How to Grow Bigger Leaves on Alocasia Regal Shield: Proven Indoor Tips That Work
- Alocasia Amazonica Care: Complete Indoor Guide
- Alocasia Jacklyn Care: Tips for Healthy Growth
- How to Propagate Alocasia Portodora from Stem Cuttings?
- How to Get Rid of Spider Mites Using 70% Alcohol (Fast Method)
- How to Propagate Philodendron Pink Princess + Root Rot Rescue
- How to Propagate Alocasia Regal Shield from Corms
Explore More Music for Your Plants & Stay Connected!
Check out my Playlist: Music for Plants and find the perfect tunes to help your plants and yourself thrive.
Don’t forget to visit my YouTube Channel Plant House & Garden and subscribe - your support means the world to me!
Connect with me on social media for more plant care tips and music updates: Instagram | Facebook | X | Pinterest | Reddit | TikTok
Love plants? Love music? Don’t miss out on new updates - hit subscribe and follow now to keep your plants happy and your space vibrant!

Written by Bojana
Plant lover, grower, and music maker behind Plant House & Garden, with 35+ years of hands-on houseplant experience. Read more about Bojana →