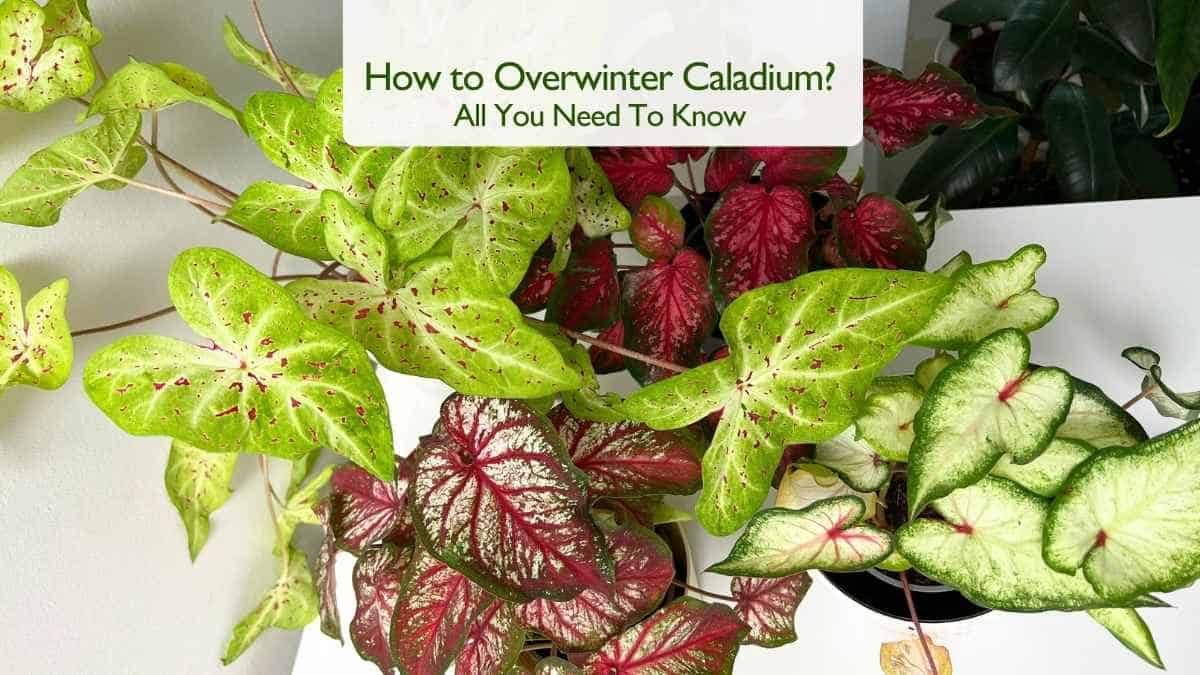
How to Overwinter Caladium: Keep Your Tubers Healthy for Next Season
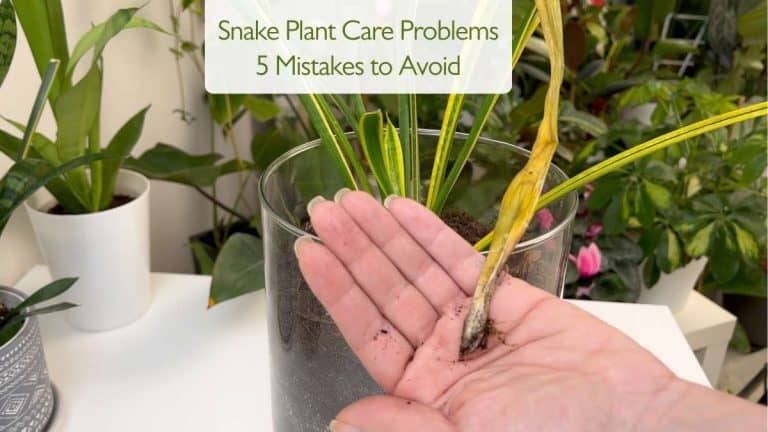
Many plant lovers start to panic when their caladiums suddenly drop leaves and look like they’re dying.
In reality, your plant isn’t dying – it’s just entering its natural rest period. Unfortunately, this is the time when most people make things worse by adding more fertilizer, watering too often, or moving the plant into stronger light – exactly the opposite of what caladiums need.
If you’re wondering how to overwinter caladium, you’re not alone. These tropical beauties can’t survive cold weather, but with the right care, they’ll come back even stronger next spring.
Caladiums are native to warm, humid climates, so when temperatures drop below 15°C (60°F), they naturally go dormant. Learning how to store and protect their tubers during winter ensures that their colorful leaves return in full glory next year.
Before we dive into how to overwinter caladium, below is a short video where I share 11 essential care tips for Caladium plants – from light and watering needs to soil mix and fertilization.
It’s a perfect quick refresher before learning what to do when your plant starts preparing for dormancy.
👉 For a complete year-round care overview, read my full guide: Caladium Plant Care Guide – Light, Watering & Growth Tips.

Click here to watch the video on YouTube
Understand the Natural Dormancy Cycle
As autumn arrives, you’ll notice your caladium leaves start to yellow and fade. This isn’t a sign of disease, it’s the plant signaling that it’s preparing to rest. During dormancy, the plant directs all remaining energy back into its tubers.

Caladiums grow from tubers, which are thick underground storage organs similar to potatoes. These tubers act as the plant’s energy bank, storing nutrients and moisture to help the plant survive through the dry or cold months when growing conditions aren’t ideal.
In nature, this rest period protects the plant from stress and allows it to regenerate stronger once warmth and light return. Understanding this natural cycle is key when learning how to overwinter caladium, because dormancy isn’t a problem to fix, it’s a vital pause that ensures healthy growth in the next season.
⚠️ Important: Let the leaves die back naturally before cutting them off. This allows the tubers to store nutrients and stay strong for the next growing season.
Choose Your Overwintering Method
There are two easy ways to learn how to overwinter caladium successfully – you can keep the plant in its pot or dig up the tubers for winter storage.
Option 1: Leave Caladiums in Their Pots
This is the easiest method and works well for small to medium-sized pots.
Once the leaves have completely died back:
- Stop watering and move the pot to a cool, dry spot (around 55–60°F / 13–16°C).
- Keep the soil slightly dry, not completely bone-dry.
- Do not fertilize or repot until spring.
If your caladium is in a larger pot, you can still keep it in the same container – just make sure it’s not staying too wet. Bigger pots hold moisture longer, so remove the top inch of soil if it feels damp and allow better airflow.
💡 Tip: If your pots are too large or heavy to move indoors, consider removing and storing the tubers instead (see Option 2 below).
🌿 How to Overwinter Caladium – My Story
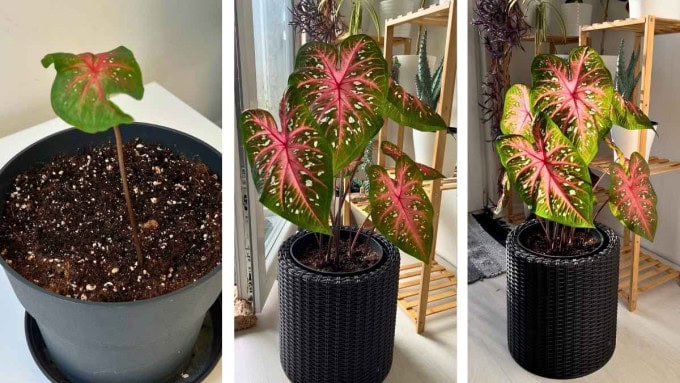
Right: The same plant bursting back to life in spring – proof of how rewarding proper overwintering can be!
Last winter, I successfully overwintered my caladium in a medium-sized pot.
After all the leaves died back, I moved it to a semi-dark spot in the room and watered it just two to three times during the entire winter, because the soil was drying out faster – the room temperature was around 68°F (20°C).
In mid-March, when the days started getting longer and warmer, I placed it in a bright spot with direct sunlight and resumed regular watering.
Within two weeks, new leaves appeared, and they were three times bigger than the previous year’s.
This simple routine showed me how resilient caladiums are when allowed to rest properly.
Option 2: Store the Tubers Separately
If you prefer saving space or refreshing the soil, you can dig up and store the tubers:
- Gently remove the tubers once the leaves have fully died back.
- Shake off excess soil and let the tubers dry for about a week in a warm, well-ventilated spot.
- Store the dry tubers in a paper bag, mesh bag, or cardboard box filled with dry peat moss, coco coir, or vermiculite.
- Keep them in a dark, dry place at around 55–60°F (13–16°C).
Avoid sealed plastic bags, as trapped humidity can cause rot. In spring, replant the tubers in fresh, well-draining potting mix and place them in a warm, bright spot to wake them up.

How Often to Water Dormant Caladiums in pot
This is one of the most common questions about how to overwinter caladium – should you water them during dormancy?
The short answer: very sparingly.
- Once the plant enters dormancy, stop regular watering completely.
- Keep the soil only slightly moist, not soaked or completely dry.
- During the winter months, add a tiny amount of water about once per month – just enough to prevent the soil from turning powder-dry.
If you’re overwintering caladiums in a warm indoor space (around 65–68°F / 18–20°C), the soil may dry faster, so two or three light waterings over winter are fine – just as I did last winter.
But if they’re stored in a cooler space, skip watering altogether to avoid rot.
✅ Remember: Never leave water sitting in the saucer under the pot, and never water if the soil still feels even slightly damp.
Restarting Growth in Spring | How to Overwinter Caladium
When the weather warms up and nighttime temperatures stay above 60°F (15°C), it’s time to wake your caladiums from their winter nap.
- Replant tubers (if stored) about 2–3 inches deep in rich, well-draining soil.
- Start watering lightly and increase gradually as new growth appears.
- Place the pots in bright, indirect light – caladiums don’t like harsh direct sun for too long.
Within a few weeks, new leaves will unfold, full of vibrant pinks, greens, and whites.
🎥 Watch the First Signs of Growth!
Here’s a short clip showing the end of caladium dormancy – the moment new leaves begin to emerge after a successful overwintering period:

Common Mistakes to Avoid
- ❌ Watering too often during dormancy – it causes rot.
- ❌ Storing tubers in plastic bags.
- ❌ Keeping them in cold, damp spaces below 50°F (10°C).
Final Thoughts | How to Overwinter Caladium
Knowing how to overwinter caladium makes it possible to enjoy their lush, colorful leaves year after year.
Whether you leave them in their pots or store the tubers separately, the key is balance: keep them dry, warm, and undisturbed during winter – then gently wake them in spring.
With a little patience, you’ll be rewarded with even larger, healthier plants, just like mine that came back three times bigger this year. 🌿✨
Related Topics:
- How to Grow Vibrant and Healthy Caladiums
- Winter Plant Care Tips: 5 BIG Mistakes to Avoid!
- Light Requirements for Houseplants – Understanding Bright vs. Low Light
Explore More Music for Your Plants & Stay Connected!
Check out my Playlist: Music for Plants and find the perfect tunes to help your plants and yourself thrive.
Don’t forget to visit my YouTube Channel Plant House & Garden and subscribe — your support means the world to me!
Connect with me on social media for more plant care tips and music updates: Instagram | Facebook | X | Pinterest | Reddit | TikTok
Love plants? Love music? Don’t miss out on new updates — hit subscribe and follow now to keep your plants happy and your space vibrant!